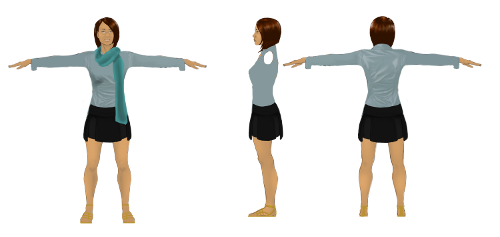
MakeHuman is a great tool for generating humanoid character models quickly. Still, it has its limitations. At present, the hair and clothing options are extremely limited, it can’t do non-humanoid avatars, and even its “proxies” are too high-poly for mobile games. Before I discovered MakeHuman, I learned how to create character models from scratch in Blender. It’s a skill which allows me to make up for MakeHuman’s shortcomings. In this article, I’ll give a brief overview of the process of manually creating a character model and provide links to Blender tutorials on the various steps.
Concept Art
To start, you’re going to need some concept art of the character you’re going to model. Concept art is more than just a few quick sketches when it comes to 3D modeling. You’re going to need side by side pictures of the character at different angles: at the minimum, a front shot and a side shot. The shots will need eyes, noses, clothes, etc. all to be lined up near-perfectly for the next step.
Creating a Base Model
Once you have your concept art, you’ll need to import it into your 3D modeling program and “trace” a low-detail version of it. This is not the final version, so don’t fret if it’s not perfect. Tutorial for Blender
Sculpting
In the sculpting step, you create a very high-detail version of your character model. This is also not the final model, but pretend it is. (This high-detail model will be far too high-poly for most game engines to handle.) You’ll be using this to create a normal map (a PNG file that allows us to trick 3D engines into making low-poly meshes look like they’re high-poly) for the final model. In Blender, this involves the sculpting tools. Tutorial
Retopologizing
Retopologizing is creating a new low-poly version of your mesh based on the high-poly version. This low-poly mesh /will/ be the final version, the one that you use in your game. Tutorial
Generating a Normal Map
Your new retopologized low-poly mesh will use a normal map which makes it look mostly like the high-poly version, but perform better. You’ll need the new low-poly and the high-poly versions of your mesh to create the normal map. Tutorial
Creating / Applying / Animating a Rig
A rig is a sort of virtual skeleton running through your mesh. Each bone in the skeleton moves part of your character model. By animating the skeleton, you animate the mesh. Simple Tutorial, Advanced Tutorial
Exporting the Final Result
When you’ve gotten your mesh retopo’d, mapped, and animated, it’s time to export. You’ll select the 3D file format according to your needs: the 3D engine you’re going to be using the mesh in and the sort of device the software will run on. (For example, MD5 isn’t very suitable for mobile at the time of writing, due to the heavy CPU cost of skeletal animation.)
Blender is an intimidating tool, but with the right instructions, everything falls into place. As a final note, when all else fails, ask an expert. The kindly folk in the #blender channel at Freenode.net are absolutely fantastic and have helped thousands navigate the Blender learning path.