At AngularJS workshops and in React internet articles, I’ve often seen instruction on using a live-reload Node.js server. A live-reload server is one that scans the project path for changes to files, and if something has changed, rebuilds the project and restarts the service. Some of them are even able to refresh the browser, so that, mere seconds after you save a file, you see the page updated. It’s an effective way to work because you get to see your changes right away, without a bunch of intermediary clicks and delays.
In this article, I’m going to explain how to set up a Spring Boot project to run with a live-reload server.
Setting Up a Basic Spring Boot Project
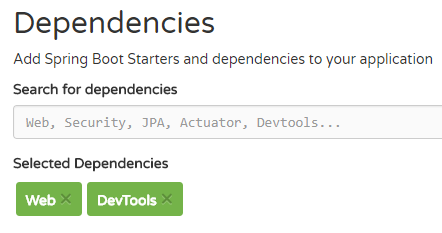
Head on over to Spring Initializr and generate a new Gradle project. (Gradle instead of Maven does matter in this case because we’re going to be using two special Gradle commands.) Select Web and DevTools in the dependencies box.
If you’re upgrading an old project, you’ll need to make sure that:
- you’re using Gradle 2.5+
- you have Spring Boot DevTools in your
build.gradlefile, in the dependencies section
Setting Up a Test Page
Extract the project folder and open it in your favorite text editor or IDE. Create a basic controller class that serves index.html.
package com.explosionduck.devtoolsdemo;

import org.springframework.stereotype.Controller;
import org.springframework.web.bind.annotation.RequestMapping;

@Controller
public class DemoController {

	@RequestMapping("/")
	public String test() {
		return "index.html";
	}
}
Also create index.html in the src/main/resources/static directory.
<!DOCTYPE html>
<html lang="en">
<head>
    <meta charset="utf-8">
    <title>Live Reload Spring Boot Demo</title>
</head>
<body>
    <h1>Here is a Title</h1>
</body>
</html>
At this point, you should be able to run the project and see index.html at localhost:8080.
Live Reloading
Now let’s set up live reloading.
- If you have the project running, stop it.
- Install the Live Reload browser extension on your browser of choice.
- Open two terminals.
- Navigate to the root directory of the project in each terminal.
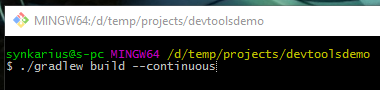
- Run the following two Gradle commands. Explanation / docs for them are here and here respectively.

- Open your browser and navigate to
localhost:8080. - Click the Live Reload icon in order to enable it for the current page.
That’s it. Now if you edit index.html, you should see the changes reflected instantly!
Extra Notes
- If you run the project in Eclipse with Spring Boot DevTools included, you will get a SilentExitException on start up. This is normal and harmless, but there is a workaround for it here.
- Hot Reloading vs Live Reloading
- If you’re serving authenticated content and need a session to persist through service reboots, try adding Spring Session support and Redis.